News / How-to
How to remove blank rows in Excel
We've been asked how to remove blank rows in Excel an absurd amount of times, so we decided to post it as it truly is a FAQ.
While there are a few ways, here is a super simple one that anyone should be able to follow.
Press the F5 Key to cause the "Go To Special" dialog box to pop up.

Select "Blanks"
This will highlight all blanks in the sheet. From here, simply delete the rows that are selected.
Enjoy!
How to get past the Windows 10 Media Creation Tool error 0x800704DD-0x90016
It seemed to take an annoying amount of time to get the Windows 10 Media Installation Tool to actually create media. We were getting a funky error (0x800704DD-0x90016) every time we tried to make a DVD or ISO.
It turns out running the tool as Administrator isn’t enough. We got it to work by logging in as Administrator then running the tool. Just to make sure this wasn’t a fluke, we tried it on several machines and sure enough this was a workaround.
How to upgrade ESXi 5.0 to 5.1 without errors using the command line.
We got a number of requests to post our how-to upgrade ESXi doc. Below are the instructions. They assume you are familiar with basic Linux commands as well as copying files to a Linux host.
Enjoy!
-Riverside
1) Download/Install/Burn needed software
a. PuTTY or equivalent SSH client
b. WinSCP or equivalent SCP/SFTP
c. ESXi 5.1 DVD/CD – Burn the DVD/CD
d. ESXi 5.0 Patches (update-from-esxi5.0-5.0_update01.zip, update-from-esxi5.0-5.0_update02.zip, etc.)
e. vSphere Client (Connect to the ESXi server in a web browser to download the client)
2) Temporarily Enable SSH
a. We don’t recommend leaving SSH on permanently. SSH can be temporarily enabled via the ESXi vSphere. Step-by-step instructions can be found at: http://www.thomasmaurer.ch/2011/08/enable-ssh-on-esxi-5-via-vsphere-client/
3) Put the ESXi system into maintenance mode
a. Make sure you have all of your VM’s backed up somewhere else just in case. While we have never had any corruption during an upgrade, it’s always wise to have quality backups prior to an upgrade.
4) Patch ESXi 5.0
NOTE: You will receive errors such as ERRORNO 39 when upgrading if you do not have current patches installed prior to upgrading.
a. Download the latest ESXi Patch sets via the VMware Patch portal: http://www.vmware.com/patchmgr/findPatch.portal
b. SFTP into the ESXi server with WinSCP.
i. Create the following directory: /vmfs/volumes/datastore1/PATCHES
ii. Upload the patches to the above directory
c. SSH into the ESXi server.
i. Change to the directory that you uploaded the patches to:
1. cd /vmfs/volumes/datastore1/PATCHES
ii. Using esxcli update the system:
1. esxcli software vib update --depot=/vmfs/volumes/datastore1/PATCHES/update-from-esxi5.0-5.0_update01.zip\

5) Upgrade ESXi 5.0 to 5.1
NOTE: You can run the ESXi 5.1 installer from a CD-ROM, DVD, or USB flash drive to do an interactive upgrade. This method is appropriate for a small number of hosts.
a. Upgrade interactively using an ESXi installer ISO image on CD-ROM, DVD, or USB flash drive.
b.
Ensure the host is in maintenance
mode & backed up
c.
Insert the ESXi 5.1 installation media
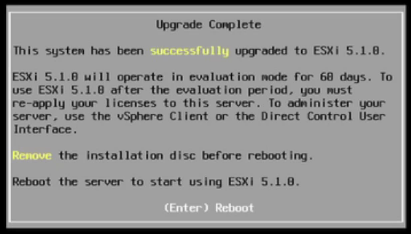
e. Follow the dialog boxes to upgrade (Enter/Enter/F11/Enter/Enter/F11/Enter)
1. Step by step video showing the upgrade post patching: http://www.youtube.com/watch?v=YS0NW5_hm5c
d. Remove the installation media then reboot

